Week 13
Preparing for Production
# Agenda
- AMA (10 mins)
- Post Authentication Redirect
- Mongoose middleware
- Storing auth session in JWT
- Adding
ownerIdto our resource - Additional routes
- Render
- Deploy an App to Render from a GitHub Repository
# Post Authentication Redirect
We currently have set that a user redirects to /private upon successful authentication, however, in practice we will want to redirect them back to the client. In addition, the client may want to redirect to a certain page. It is a bad user experience if I try to go a certain page, am requested to sign in, then I am sent back to the homepage instead of the page I originally wanted.
To handle this dynamically, we will accept a redirect_url query param in our auth/google route, and use this as the redirect success url.
To do this, we will have add a layer in front of the passport.authenticate middleware.
Google accepts a state property to its oauth consent page, that will be sent back with the login response.
// src/router/auth.js

authRouter.get("/google", (req, res, next) => {
  // localhost: 3001/auth/google?redirect_url=http://localhost:3000/login-success
  const { redirect_url } = req.query; // redirect_url = http://localhost:3000/login-success

  const authenticator = passport.authenticate("google", {
    scope: ["profile"],
    state: redirect_url,
  });
  authenticator(req, res, next);
});
We can now expect the state property to appear in our /auth/google/callback route, and can use this as the redirect value, with / as a fallback if it was not supplied.
// src/router/auth.js

authRouter.get(
  "/google/callback",
  passport.authenticate("google", { failureRedirect: "/login" }),
  (req, res) => {
    const redirectUrl = req.query.state ?? '/';
    res.redirect(redirectUrl);
  }
);
# Mongoose middleware
It can get confusing using the _id property given to use from mongo. Is it a string? Is it an object? Why is there a _?
Mongoose has the ability to transform the data coming from the db using their middleware. Let's add an id property to our User to make our lives easier.
// src/models/User.js

...
}, {
    timestamps: true
});

// we can tell our scheama to perform a this callback every time toObject is called.
// toObject is called by default with any of the find methods (find, findById, etc)
UserSchema.set('toObject', {
    transform: (_doc, ret) => ({
        ...rets,
        id: ret._id.toString()
    })
})
id of type string is now attached to every user!
# JSON Web Token
Because our server and client are on separate domains, we cannot simply use cookies stored in the browser. We will use the defacto industry standard JSON Web Tokens (JWT) (opens new window). There are libraries for just about every popular programming language. Let's install the Node.js module.
yarn add jsonwebtoken
We will manually recreate what passport is doing with the deserializeUser and serializeUser, except instead of storing the userId in the session, we will store it in a JWT, and pass the JWT to the client, to be saved in localstorage or sessionstorage
You should read the full documentation on JWTs but here are two critical things to understand.
The payload is hashed, not encrypted. Anyone with some JavaScript can read it. So, never put sensitive data in the token payload.
The token is cryptographically signed using a secret key on your sever. So we can validate that no one has altered the contents of the payload. Which means we can trust it.
Let's check the usage instructions (opens new window) ...
We need to require the library at the top.
// src/router/auth.js

const jwt = require('jsonwebtoken');
We will get the secret from our .env file.
JWT_SECRET=super-secret-password
# Generating the token
Just like for our session, we only want to save the user's id in our JWT token, so that we can use the id to lookup the user's data. This prevents holding stale data in the token in the event the user document is updated.
After a successful return from google, passport will automatically add the user to the request, so we can access the user's id from here.
Use the jsonwebtoken library and the secret from process.env to sign a new token, and send it with the redirectUrl to the client.
// src/router/auth.js

authRouter.get(
  "/google/callback",
  passport.authenticate("google", { failureRedirect: "/login" }),
  (req, res) => {
    const redirectUrl = req.query.state ?? '/';

    const token = jwt.sign({ id: req.user.id }, process.env.JWT_SECRET)

    res.redirect(`${redirectUrl}?token=${token}`);
  }
);
We will no longer worry about serializing / deserializing the user with passport, so we can clean up our middleware like so:
passport.serializeUser((user, done) => done(null, user));
passport.deserializeUser((user, done) => done(null, user));
# Authenticating with JWT
Now that the token has been generated, we will expect the client to store this token, and any requests that will come from the authenticated user will include this token in the headers.
The popular place to store is in the Authentication header, using the format: Bearer [token]. We can use this knowledge to create a middleware function that will mimic the passport.session() middleware, attaching the user to req.user with a verified JWT or responding with a 401 if the token is missing or invalid.
We will replace our isAuthenticated middleware function.
// src/middleware/isAuthenticated.js

"use strict";

const { verify } = require("jsonwebtoken");
const User = require("../models/User");
const { UnauthorizedError } = require("../utils/errors");

const isAuthenticated = async (req, res, next) => {
  const token = req.headers.authorization?.replace("Bearer ", "");

  if (!token) return next(new UnauthorizedError("Please sign in"));
  try {
      const { id } = verify(token, process.env.JWT_SECRET);

      const user = await User.findById(id);
      if (!user) return next(new UnauthorizedError("Please sign in"));
      req.user = user;

      return next();
  } catch(error) {
    next(new UnauthorizedError(`JWT error: ${error.message}`));
  }
};

module.exports = isAuthenticated;
Test with postman!
Follow the usual path to login /auth/google. We should see once we redirect ?token=eyJhbGciOiJIUzI1NiIsInR5cCI6IkpXVCJ9.eyJpZCI6IjY0MWNkM2M5NmQ0N2I4NmQyYTA3NzU3YyIsImlhdCI6MTY4MTA1MTg3MH0.ZD_390iQB7-ZUDRlujRHkfGTxs4HoO-rvKiZD4uDgL0 in the url. Lets copy this token, and add it to the headers in Postman.
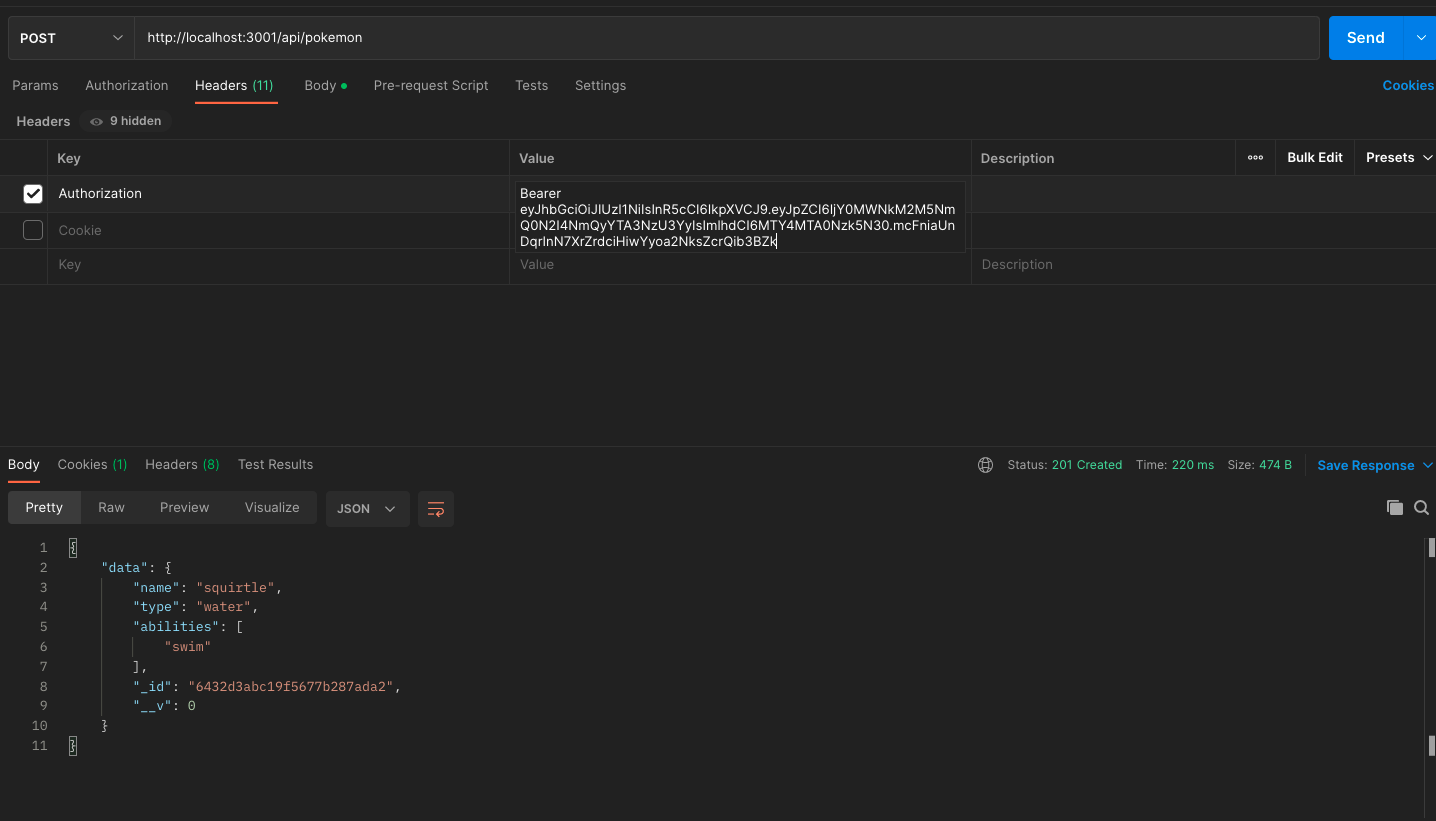
Success!!
# My own pokemon
Our pokemon app currently allows everyone to create pokemon, but no way to organize which pokemon you have made. I'd like to be able to keep track of the pokemon I have collected. Let's alter our pokemon model to have an ownerId, so we know who it belongs to.
// src/models/pokemon
const { Schema, model } = require("mongoose");

const pokemonSchema = new Schema({
  name: {
    type: String,
    required: true,
  },
  type: {
    type: String,
    required: true,
  },
  abilities: [
    {
      type: String,
    },
  ],
  // add the following to connect a pokemon to a user
  ownerId: {
    type: Schema.Types.ObjectId,
    required: true,
    ref: "user",
  },
});

module.exports = model("pokemon", pokemonSchema);
We can add a new route to GET only the pokemon that the authenticated user has created.
// src/router/pokemon.js

pokemonRouter.get('/me', PokemonController.getMyPokemon);
// src/controllers/pokemon.js

const getMyPokemon = async (req, res, next) => {
    try {
    const pokemon = await PokemonService.getMyPokemon(req.user.id);
    res.json({ data: pokemon });
    } catch(error) {
        next(error)
    }
}
// src/services/pokemons.js

const getMyPokemon = async (ownerId) => {
  const myPokemon = await Pokemon.find({ ownerId });
  return myPokemon;
};
Don't forget to add to the exports!
module.exports = {
  getAll,
  // add here
  getMyPokemon,
  getOne,
  create,
  replace,
  update,
  deleteOne,
};
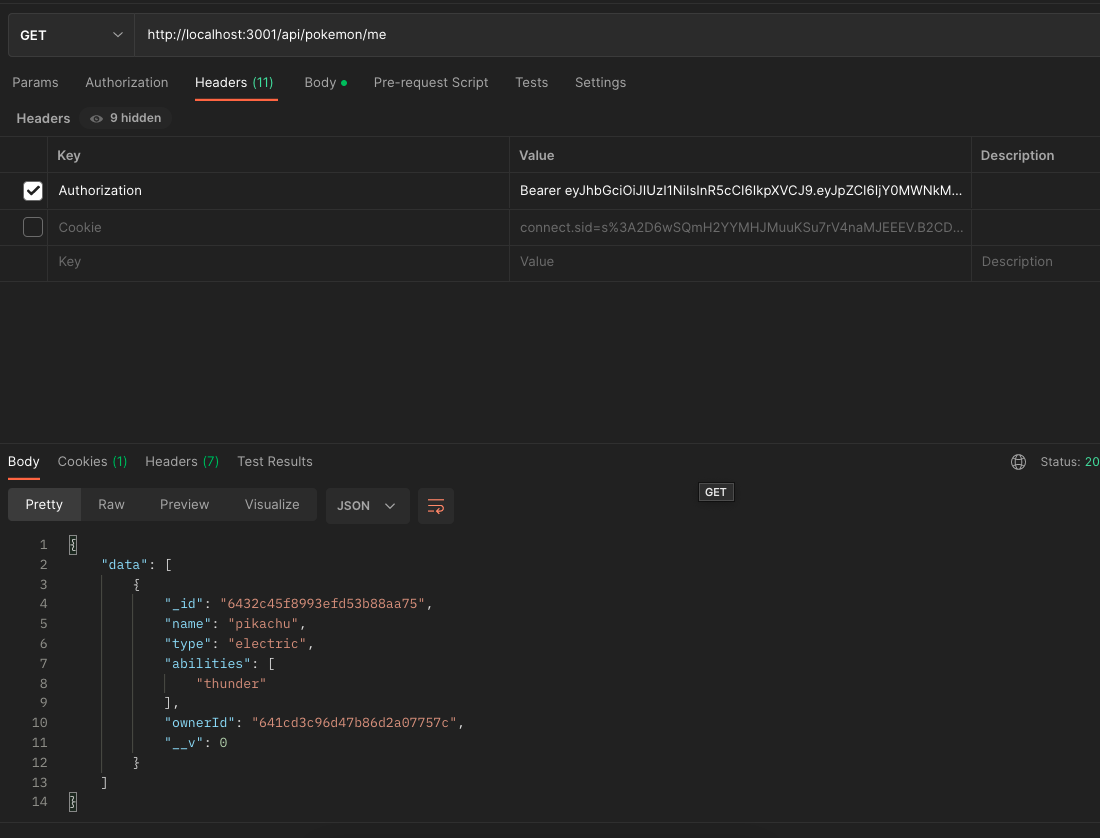
Test with postman!
We should see an empty array here, as all the pokemon we have created so far don't have an ownerId yet.
Lets modify our POST method to assign the ownerId.
// src/controllers/pokemon.js

const create = async (req, res, next) => {
  try {
    // we will send the req.user.id to the pokemon service here
    const createdPokemon = await PokemonService.create(req.user.id, req.body);
    res.status(201).json({ data: createdPokemon });
  } catch (error) {
    next(error);
  }
};
// src/services/pokemon.js

const create = async (ownerId, pokemonData) => {
  const newPokemon = new Pokemon({
    ...pokemonData,
    ownerId,
  });
  await newPokemon.save();
  return newPokemon;
};
We can see in Compass now, that any pokemon will be saved with the logged in user's id!
Try the api/pokemon/me route now, and we should see our pokemon on the list!
It makes sense to only be able to edit / delete our own pokemon, so let's update the logic for replace, update and delete as well:
// src/controllers/pokemon.js
const replace = async (req, res, next) => {
  try {
    const replacedPokemon = await PokemonService.replace(
      req.params.id,
      req.user.id,
      req.body
    );
    res.json({ data: replacedPokemon });
  } catch (error) {
    next(error);
  }
};

const update = async (req, res, next) => {
  try {
    const updatedPokemon = await PokemonService.update(
      req.params.id,
      req.user.id,
      req.body
    );

    res.json({ data: updatedPokemon });
  } catch (error) {
    next(error);
  }
};

const deleteOne = async (req, res, next) => {
  try {
    const deletedpokemon = await PokemonService.deleteOne(
      req.params.id,
      req.user.id
    );
    res.json({ data: deletedpokemon });
  } catch (error) {
    next(error);
  }
};
// src/services/pokemon.js

const replace = async (id, ownerId, pokemonData) => {
  if (!pokemonData.name || !pokemonData.type || !pokemonData.abilities)
    throw new BadRequestError("Name, Type and Abilities are required");

  const replacedPokemon = await Pokemon.findOneAndUpdate(
    { _id: id, ownerId },
    {
      ...pokemonData,
    },
    {
      returnOriginal: false,
    }
  );

  if (!replacedPokemon)
    throw new NotFoundError(`Pokemon with id ${id} not found`);

  return replacedPokemon;
};

const update = async (id, ownerId, updatedFields) => {
  if (!Object.keys(updatedFields).length)
    throw new BadRequestError("Nothing to update");
  const updatedPokemon = await Pokemon.findOneAndUpdate(
    { _id: id, ownerId },
    {
      ...updatedFields,
    },
    {
      returnOriginal: false,
    }
  );

  if (!updatedPokemon)
    throw new NotFoundError(`Pokemon with id ${id} not found`);

  return updatedPokemon;
};

const deleteOne = async (id, ownerId) => {
  const deletedPokemon = await Pokemon.findOneAndDelete({ _id: id, ownerId });

  if (!deletedPokemon)
    throw new NotFoundError(`Pokemon with id ${id} not found`);

  return deletedPokemon;
};
Our app is now more functional! A user can no create update and delete their own pokemon, and keep them separate from another users data!
# Additional Routes
Express allows us to have as many params as we want in our routes. Let's say we are making a pokemon game, and a pokemon's ability will do damage. Lets update our pokemon model to have an embedded Ability Schema
const abilitySchema = new Schema({
    name: {
        type: String,
        required: true
    },
    damage: {
        type: Number,
        default: 5,
        min: 0,
        max: 10
    }
})
...
// update the pokemonSchema's abilities here
abilities: [abilitySchema],
Now, when we save a pokemon, each ability will automatically generate an _id, just like pokemon does!
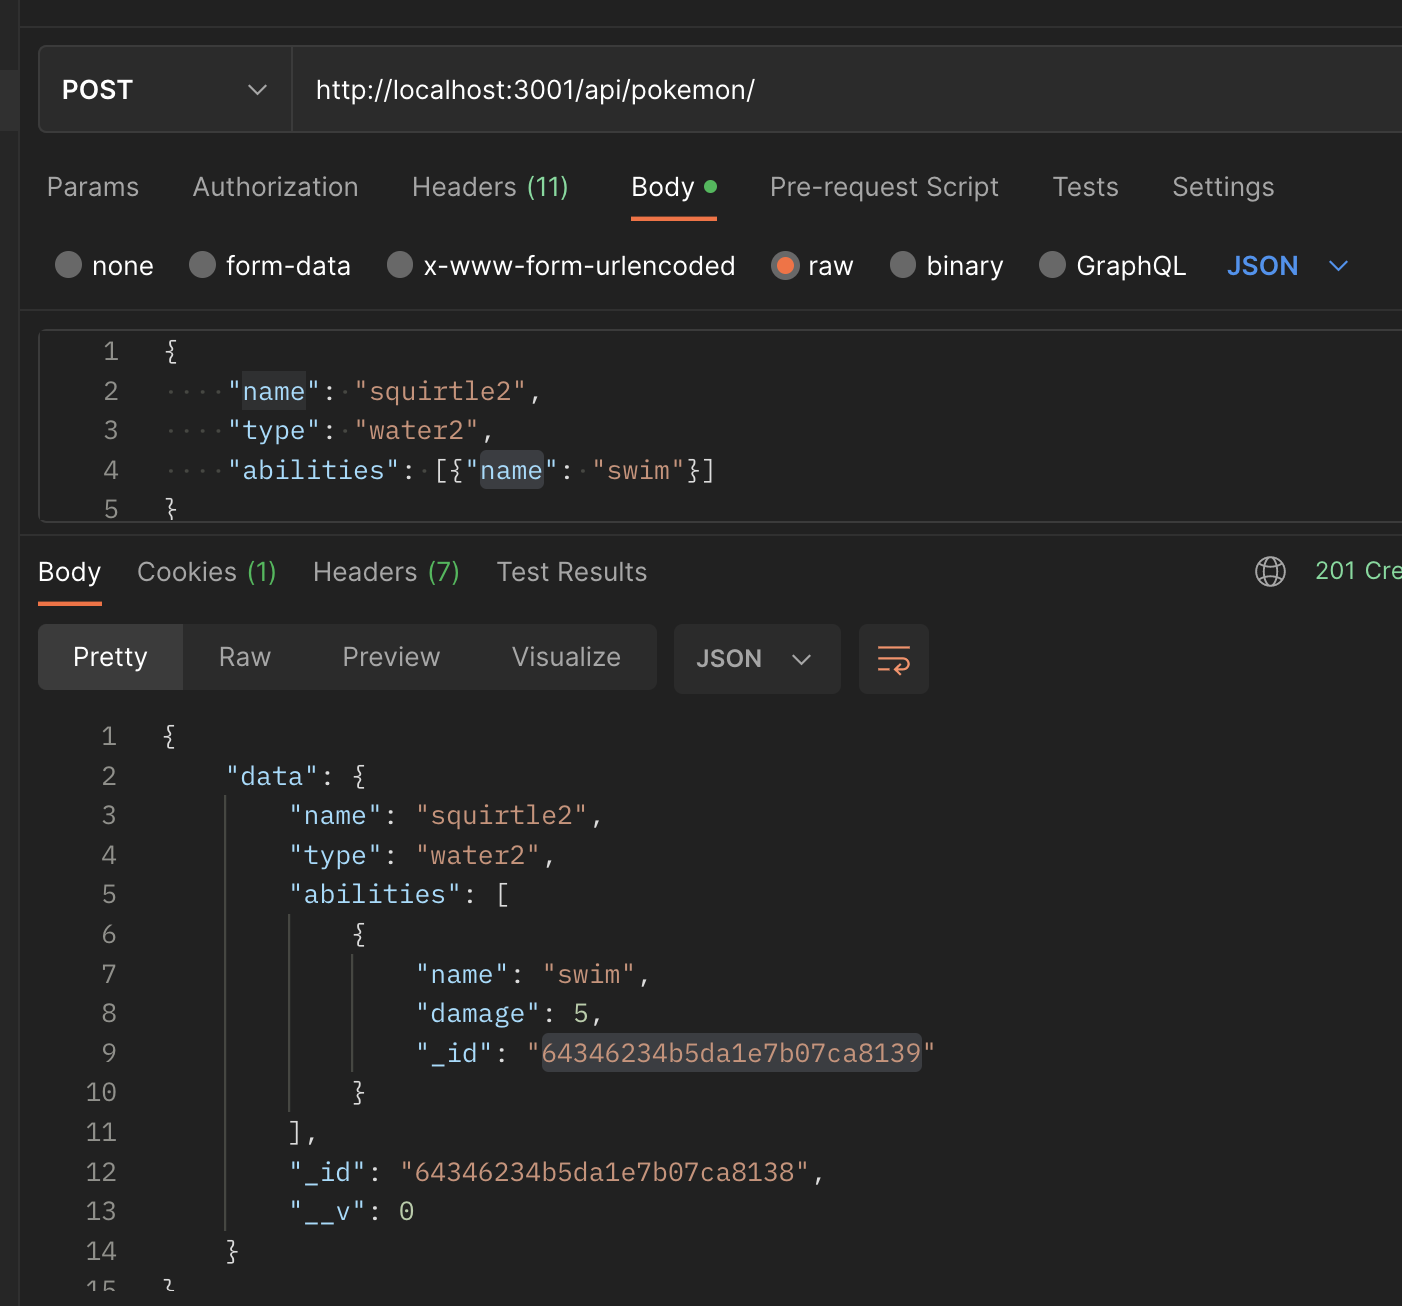
We can no use this id to look up a specific ability! Let's create 2 new routes: one to get all the abilities for a given pokemon, and another to get the details for a specific ability.
// src/router/pokemon.js

pokemonRouter.get("/:id/abilities", PokemonController.getAbilities);
pokemonRouter.get("/:pokemonId/abilities/:abilityId", PokemonController.getOneAbility);
// src/controllers/pokemon.js

const getAbilities = async (req, res, next) => {
  try {
  const abilities = await PokemonService.getAbilities(req.params.id);
  res.json({ data: abilities });
  } catch(error) {
    next(error)
  }
};

const getOneAbility = async (req, res, next) => {
  try {
  const ability = await PokemonService.getOneAbility(req.params.id);
  res.json({ data: ability });
  } catch(error) {
    next(error)
  }
};
// src/controllers/pokemon.js

const getAbilities = async (id) => {
  const foundPokemon = await Pokemon.findById(id);
  if (!foundPokemon) throw new NotFoundError(`Pokemon with id ${id} not found`);
  return foundPokemon.abilities;
};

const getOneAbility = async (pokemonId, abilityId) => {
  const foundPokemon = await Pokemon.findById(id);
  if (!foundPokemon) throw new NotFoundError(`Pokemon with id ${id} not found`);

  const ability = foundPokemon.abilities.find(({_id}) => _id.toString() === abilityId)

  if (!ability) throw new NotFoundError(`Ability with id ${ability} not found`);

  return ability;
};
Don't forget to update the exports!
module.exports = {
  getAll,
  getOne,
  // add these
  getAbilities,
  getOneAbility,

  create,
  replace,
  update,
  deleteOne,
};
# Render
Render.com (opens new window) provides website hosting from a worldwide CDN (content delivery network). It’s a network of servers that store your website files and deliver the files extremely rapidly when people visit your website. Apart from speed, three features stand out:
- Website hosting is free for static sites.
- You can use your own custom domain for free.
- Your website deploys automatically from GitHub.
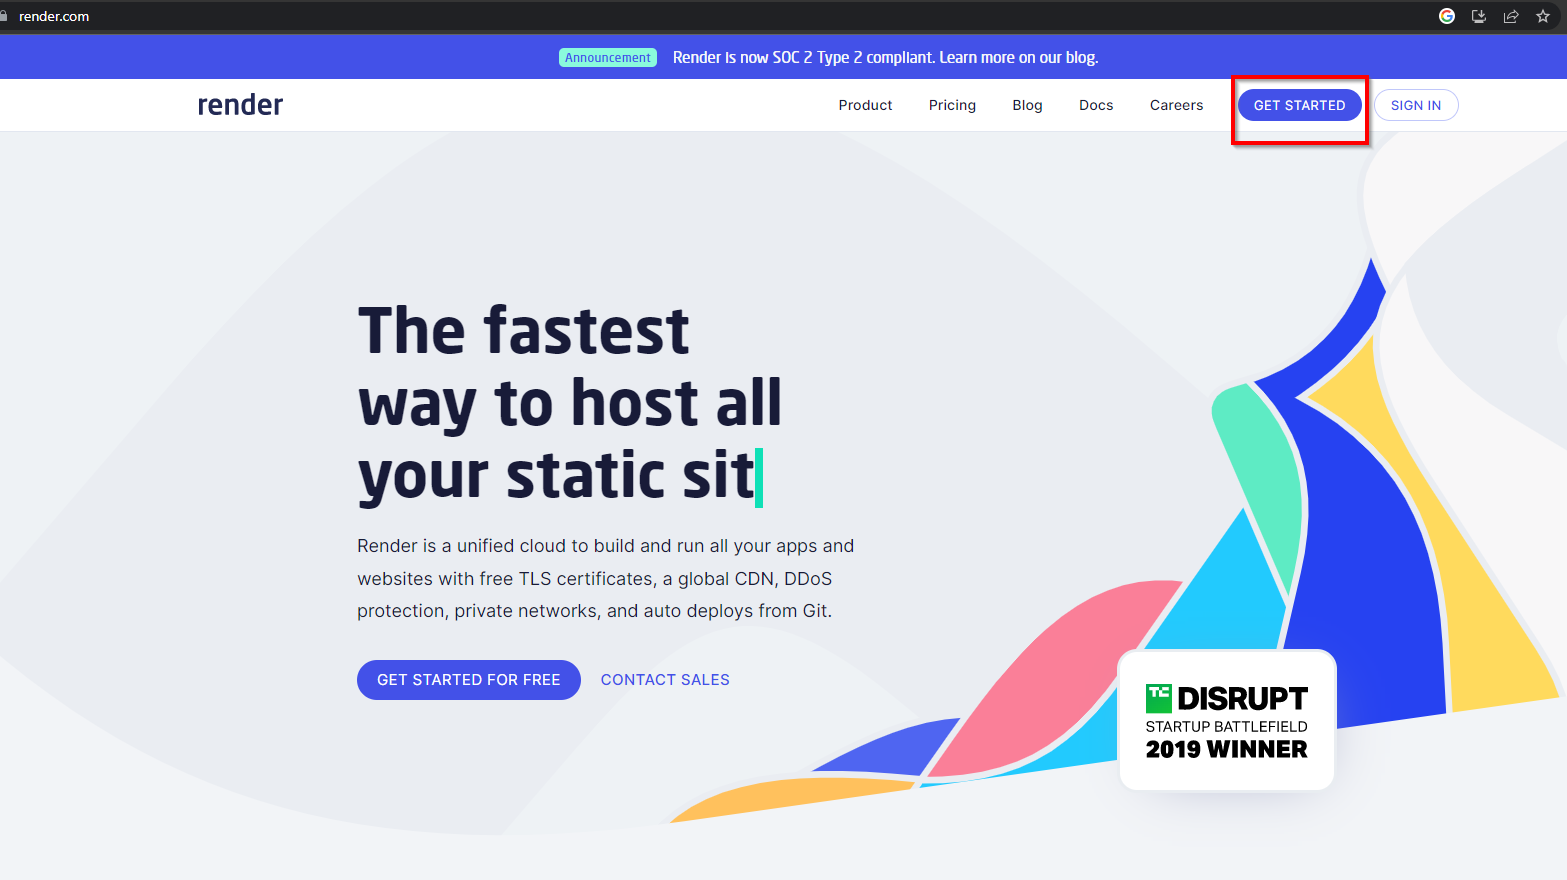
# Deploy an App to Render from a GitHub Repository
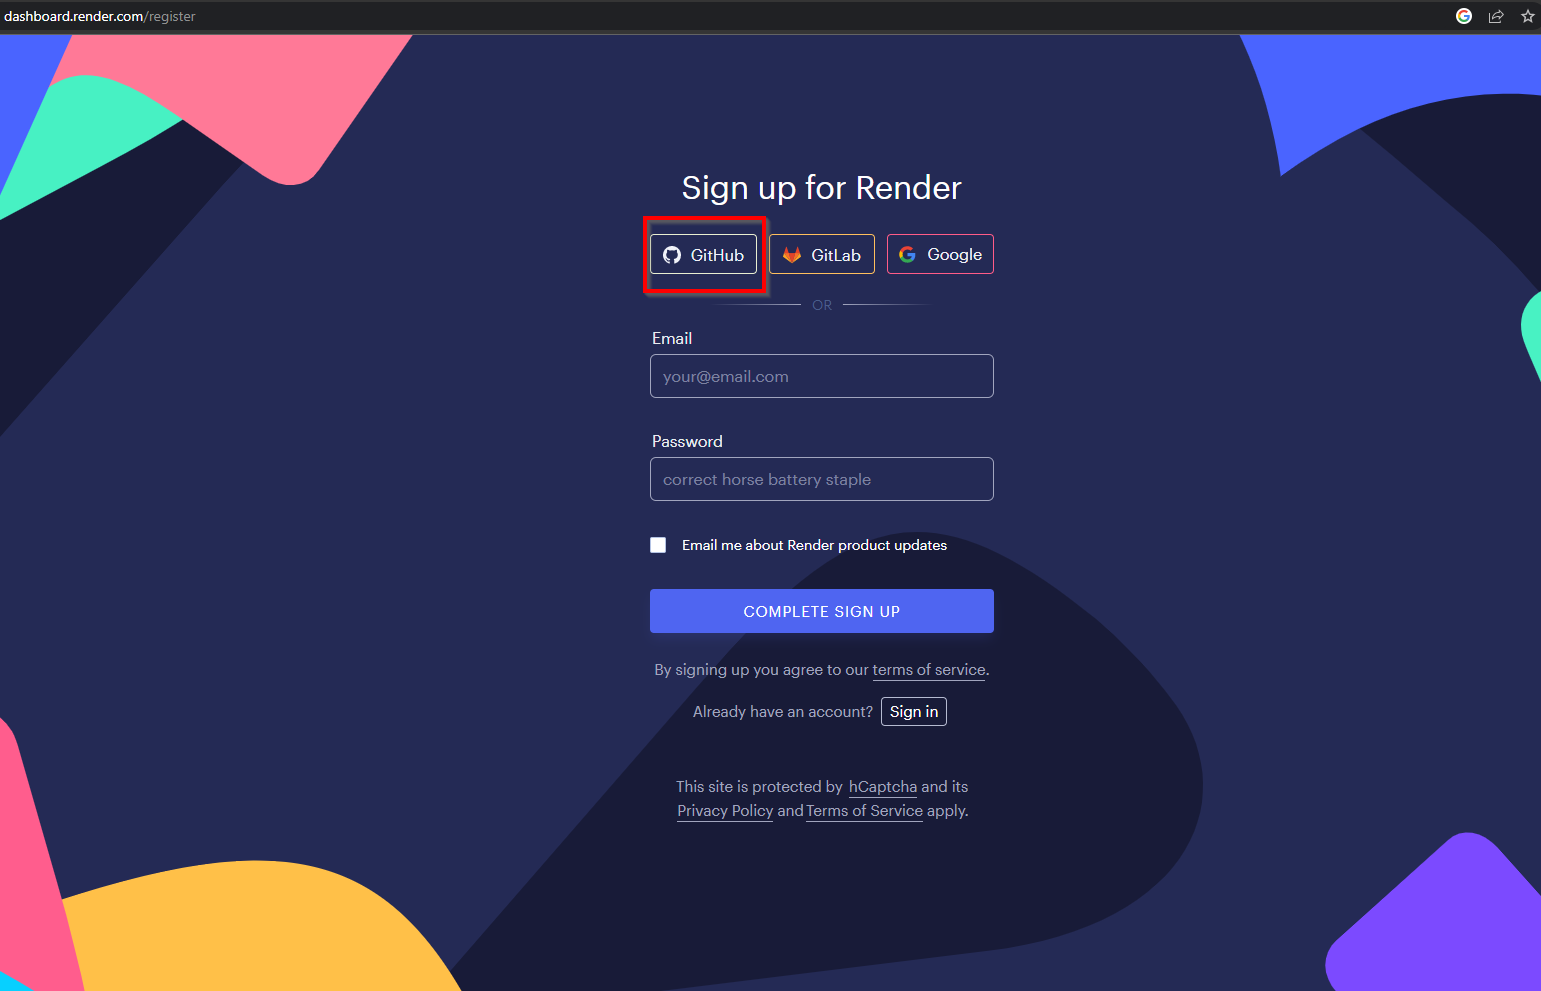
Go to Render.com (opens new window), and select Get Started to create your account.
It's best to sign up with GitHub first so you can click GitHub to authorize and create your account.
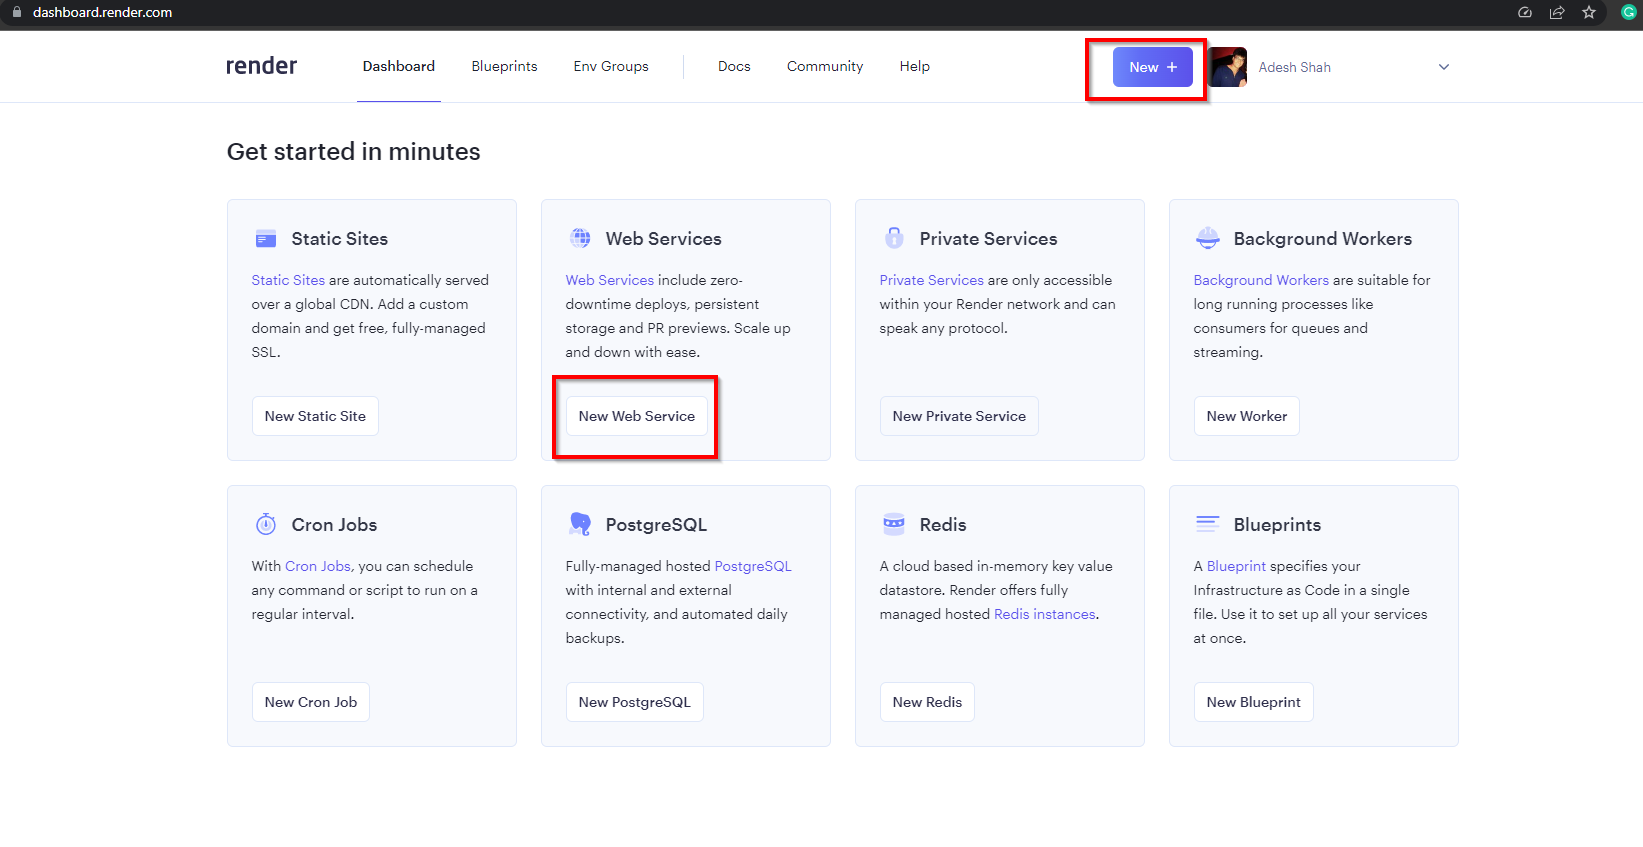
Once signed up and logged in to your account, you will see a dashboard like this:
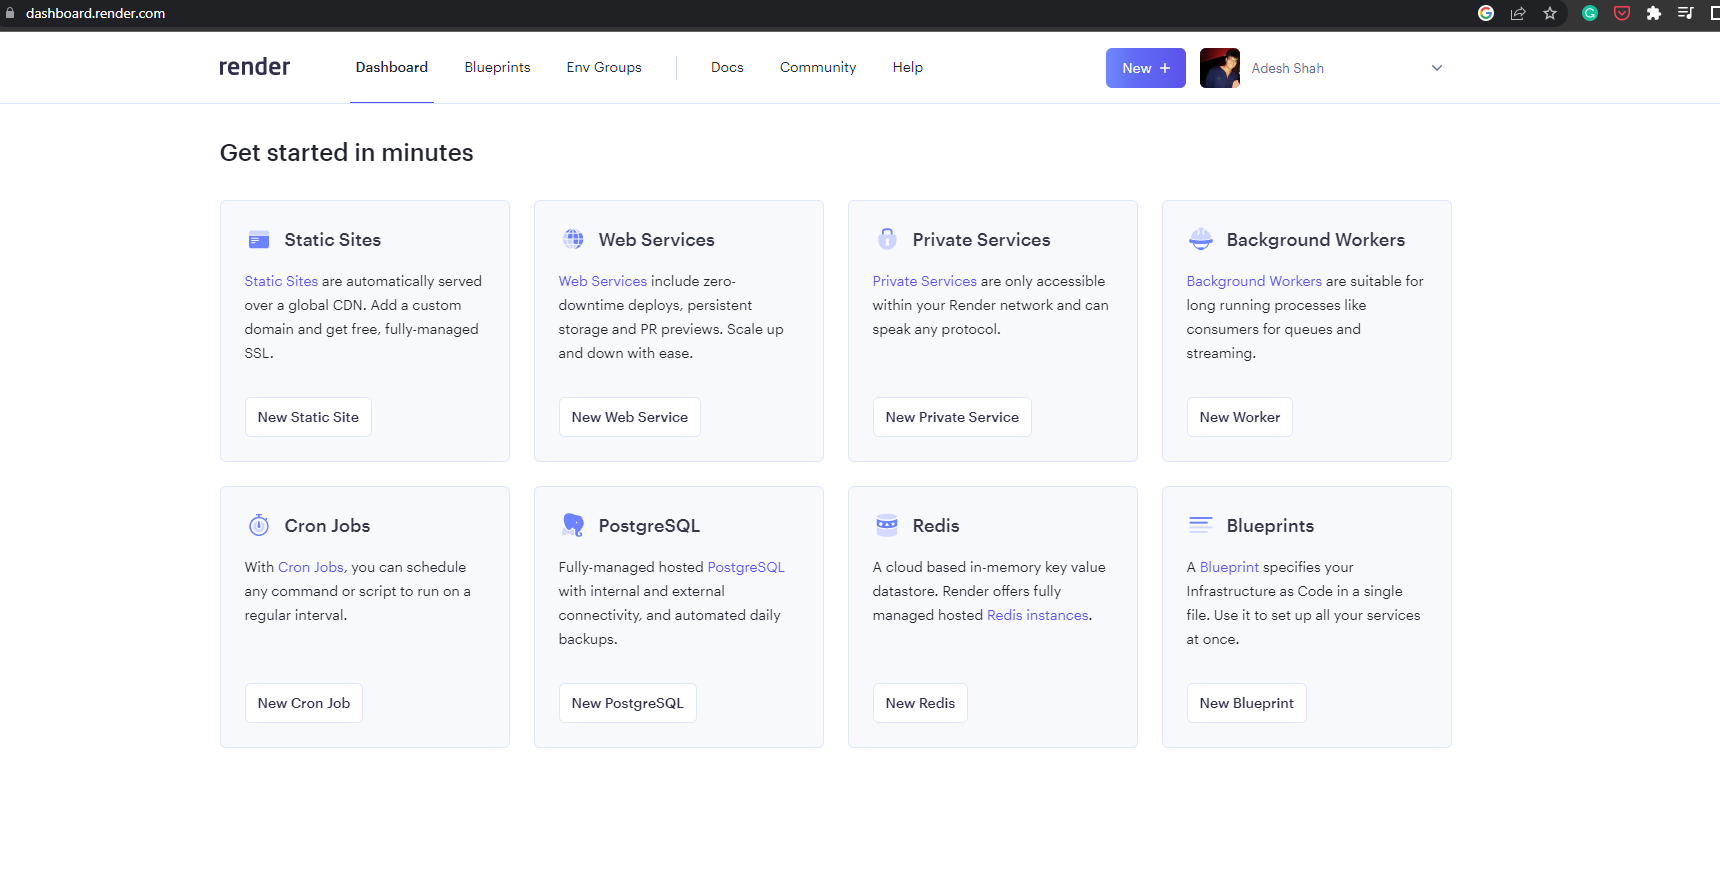
To deploy a Node.js application, click on the New Web Service button under the Web Services option.
You can also click on the New + button displayed in the header just before your profile picture and select Web Service option.
Once clicked, you will see the following screen:
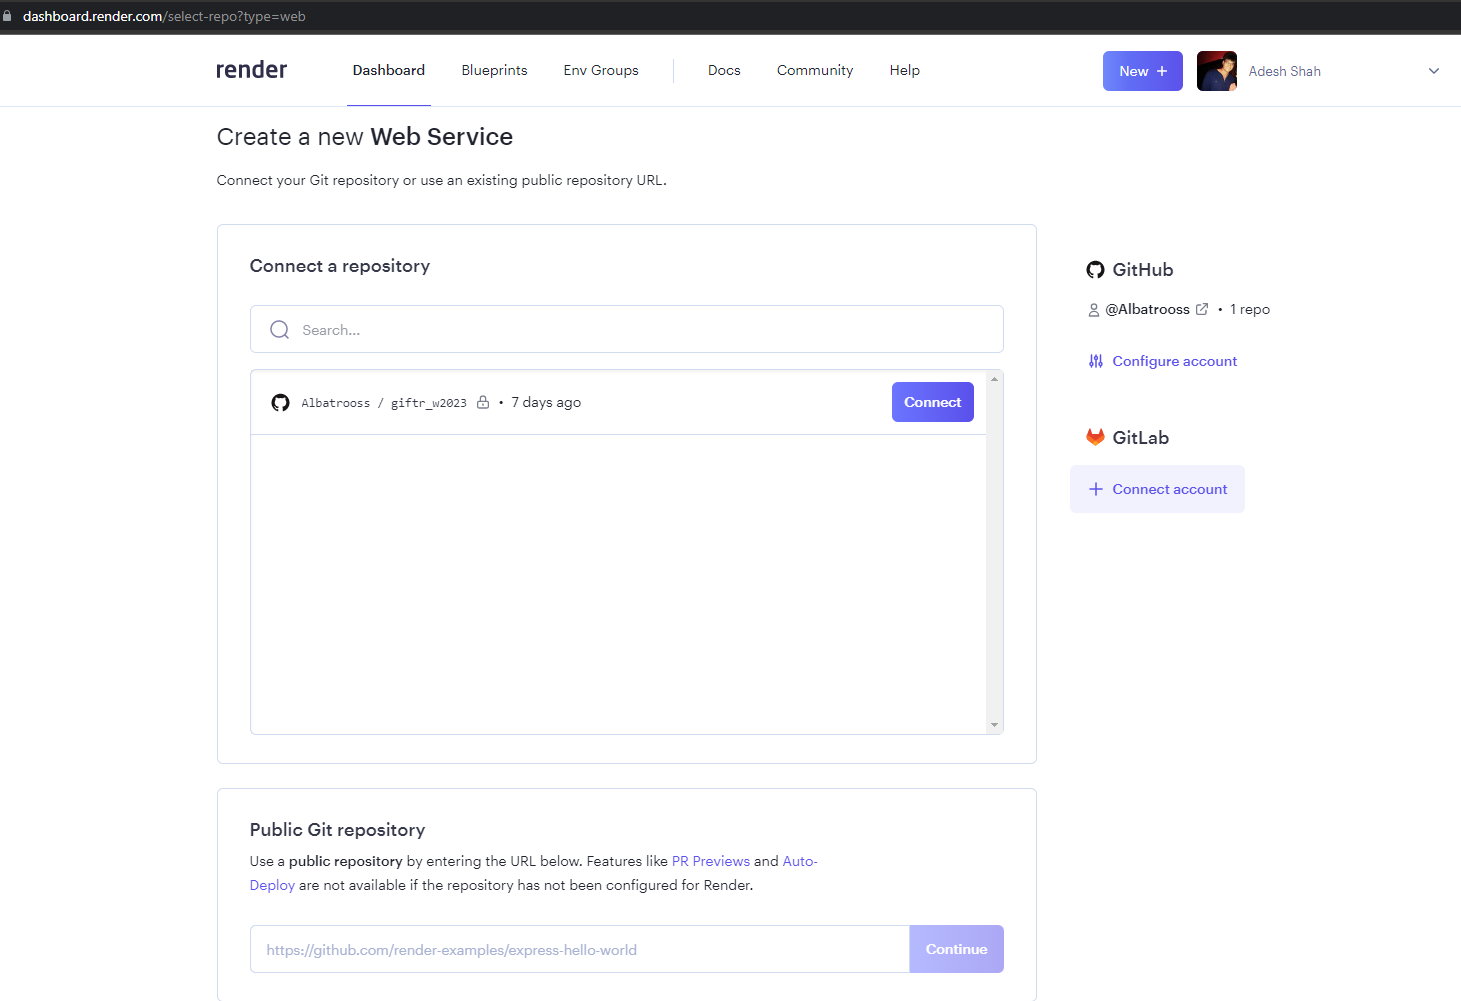
Next up is to choose your repository, and click connect
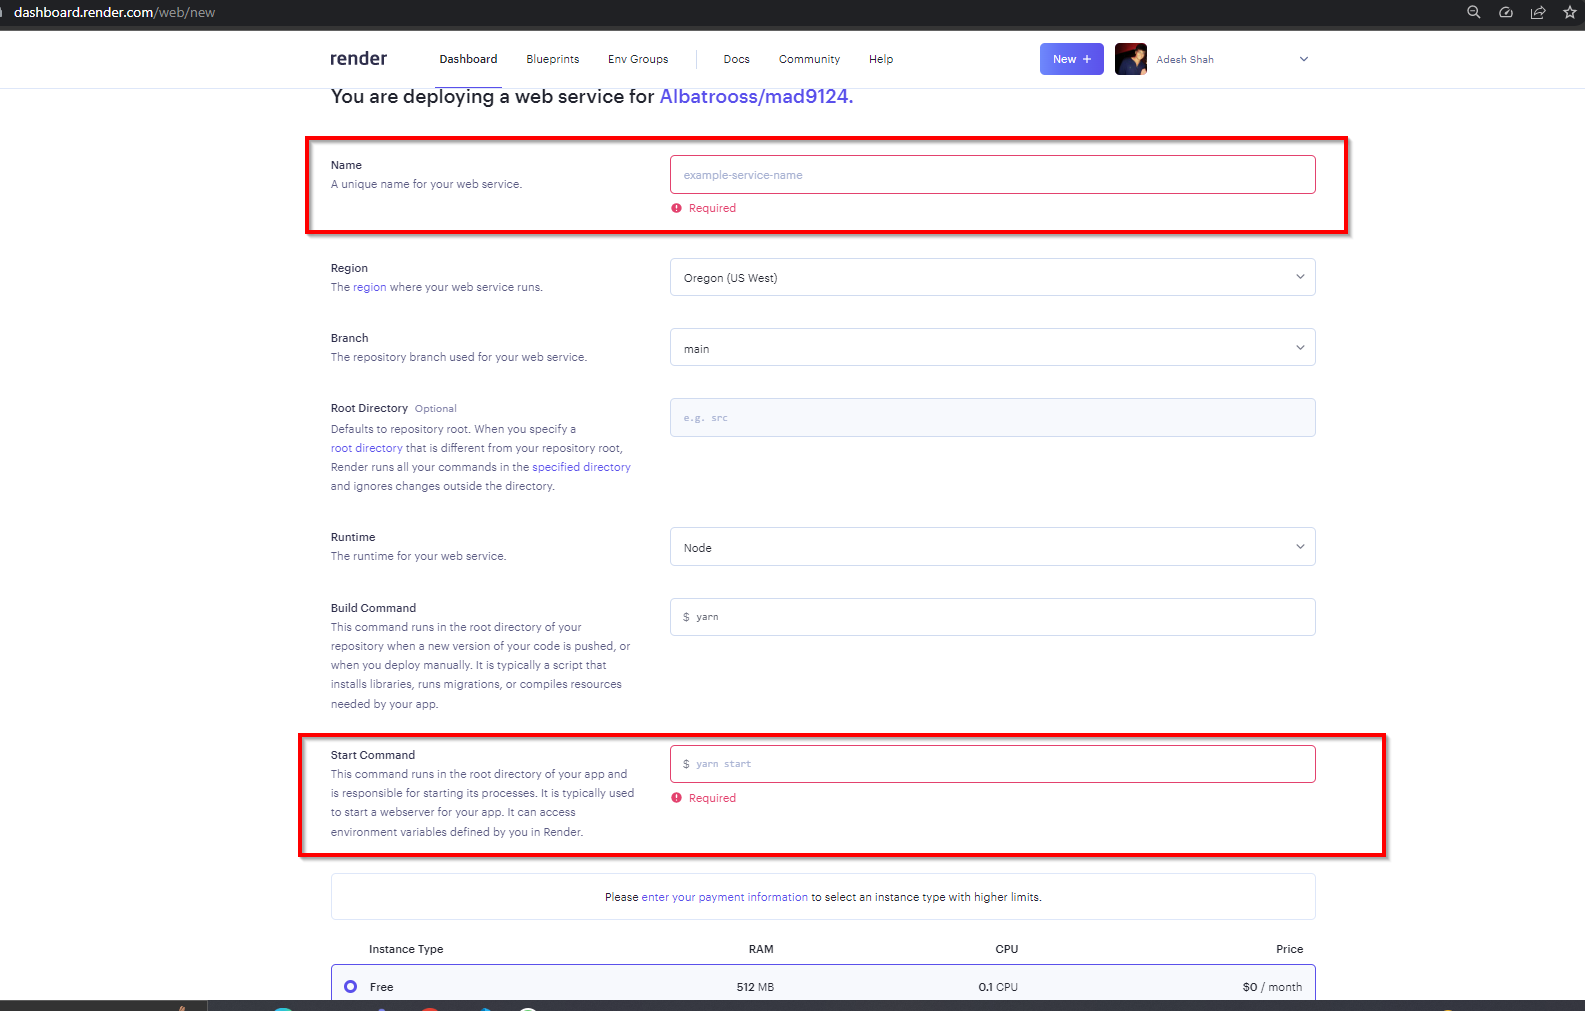
Here, for the Name field, enter the a short and simple name to identify your website.
Note: keep the Name value simple because it will become your application URL once the application is deployed. So if I enter github-mad9124 as the value for the Name, my application URL will become https://github-mad9124.onrender.com.
So make sure to enter a short and meaningful value for Name.
For Build Command enter yarn as the value which is equivalent to the yarn install command, and for the Start Command enter yarn start as the value, assuming you have set up the script in package.json.
If you scroll down a bit more, you will see an Advanced button. Our application is using many environment variables, you can enter them in the Advanced settings as shown below. You can also add your .env files so you don't need to enter them manually one by one.
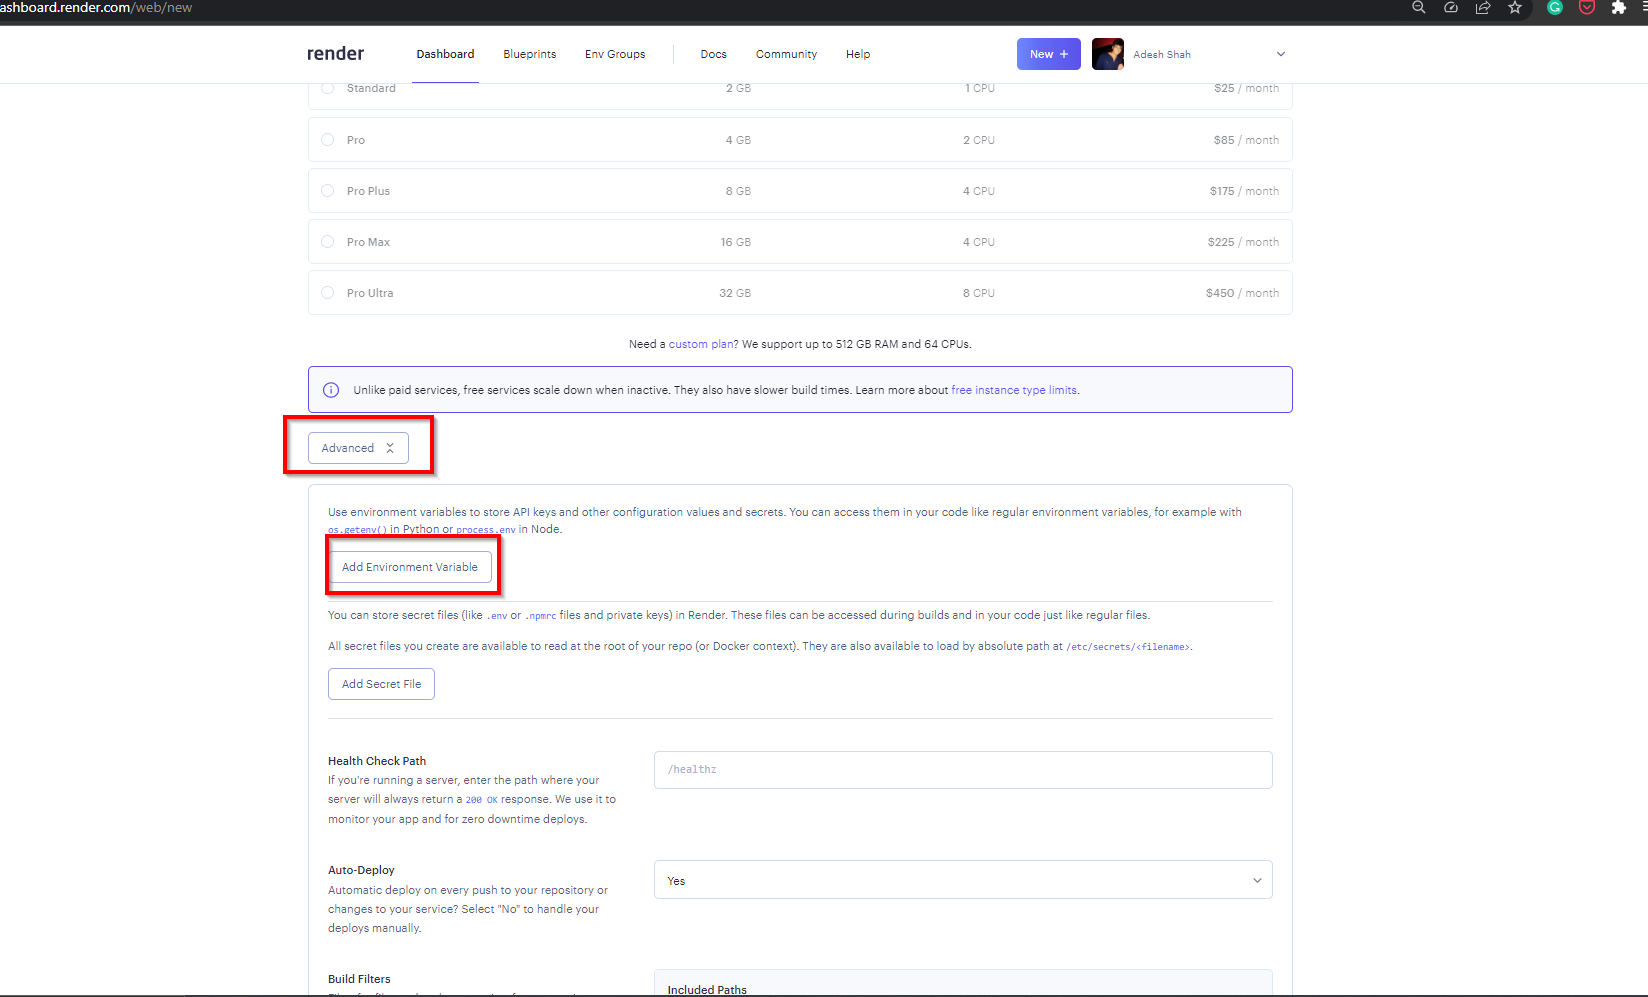
The default version of Node used by Render will not work with mongoose. We need to tell Render to use a late version of node so that it will work. We can do this by setting the NODE_VERSION environment variable. We will set it to 18.13.0.
Note: the Auto-Deploy field has default value of Yes – so once you push your code changes to GitHub repository, they will be automatically deployed to Render.
Click on the the Create Web Service button to start the deployment process. Once the deployment is completed, you will see your application is deployed Live as shown below:

# Testing our deployment
Fire up Postman, and let's check our GET endpoint.
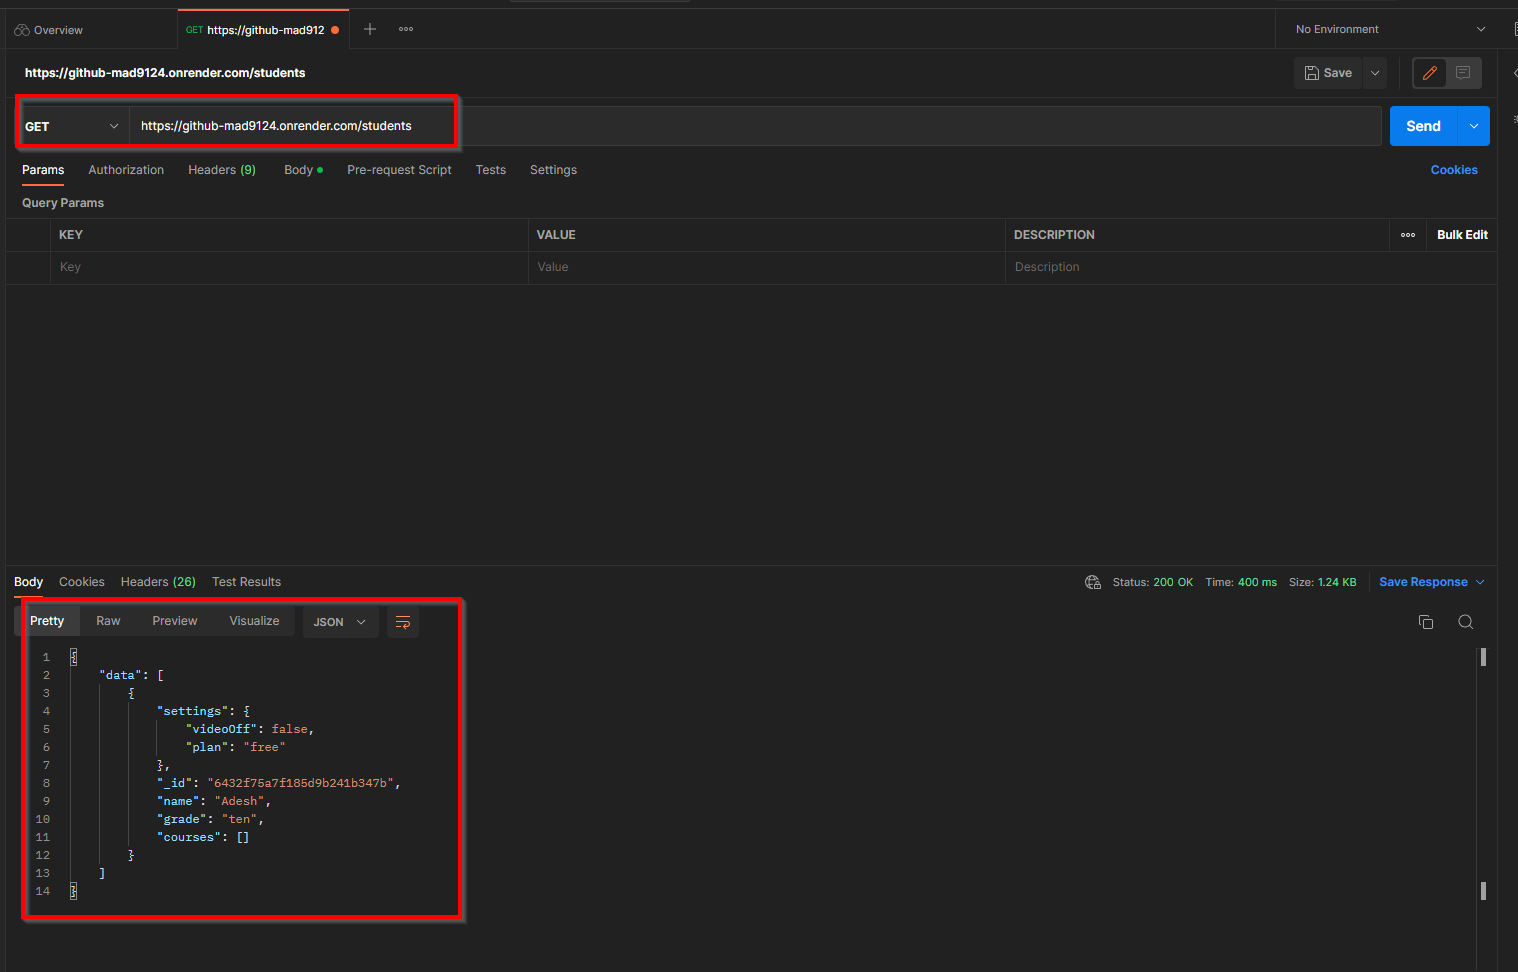
It works! Now we can test our other endpoints to make sure we can do full CRUD operation via a newly hosted API on Render.